LaserBot assembled
http://bombilee.blogspot.com/2010/12/laserbot-assembled.html
 Here is the my little robot with Neato's XV-11 360 degree laser scanner. Runs with 12V battery, control by dsPIC33FJ64MC802 MCU communicate with PC via BGB203 Bluetooth. The circuit board/robot was using for my old robot project but it fits nicely with new Laser Distance Sensor (XV-11 LDS). I plan to use it to finish the SLAM challenge form the Open Lidar Project
Here is the spec.:
MCU: dsPICFJ64MC802
Motor: PITTMAN GM9434H128R2 24V DC ,GEAR RATIO=19.7:1 , @ 24V max speed 313 RPM
ENCODER: MTL MEH-17-300, 300 PPR
WHEEL Diameter: 9.6 cm
H-Bridge: L298 Dual H-Bridge Motor Driver, 2A max each channel.
LDS motor is power by TIP102 NPN Darlington Transistor(Low side drive). Motor only need around 3.3V 65mA to operate.
OS: Running FreeRTOS V6
Communication: BGB203 Bluetooth(Sparkfun) @115200BPS
Neato Robotics XV-11 Tear-down
The latest in robotic vacuum cleaning is the XV-11 from Neato Robotics - and it features a scanning LIDAR laser range-finding module that is ripe for repurposing in other robots. Chris over at Sparkfun lovingly tore in to one and wrote up the results so far - the module has a simple serial port interface that will probably soon be decoded and understood.

 Read the teardown & exploration here
Read the whitepaper on this $30 LIDAR module (so far available only in this $400 robot)
Via Solid State Depot mailing list, the Boulder hackerspace. Chris will be presenting at Tuesday night's meeting, so stop by if you're in the area!

 Read the teardown & exploration here
Read the whitepaper on this $30 LIDAR module (so far available only in this $400 robot)
Via Solid State Depot mailing list, the Boulder hackerspace. Chris will be presenting at Tuesday night's meeting, so stop by if you're in the area!
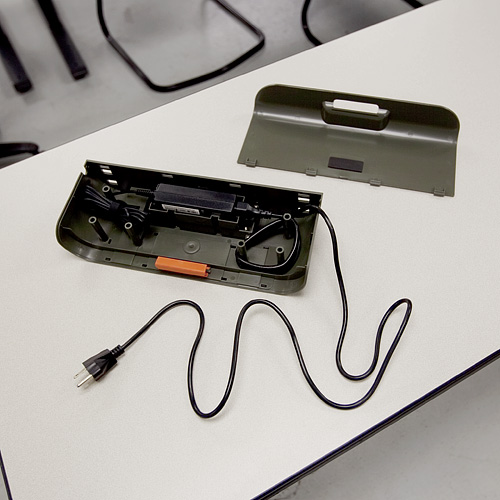
On first start up, the bot made some cutesy beep-boop robot noises and insisted that we charge its battery (the robot always refers to itself in the first person on its LCD display). So we stuck it on its wall-charging station for a while. Nothing fancy here, just a couple of spring-loaded contacts that press on the contacts on the back of the bot. However, Neato made the base charger as a simple structure for a standard power supply so the user can remove the power supply and plug it in if desired.
Once the bot was charged, we gave it a test run. The XV-11 came with a flexible magnetic strip that allows the user to "block" the bot from areas of a room, so we had a little fun laying down the strip to box the bot in. It successfully vacuumed one side of an office before we purposely confused it with the magnetic strip. When we gave it the command to return to the base station, it seemed pretty lost, and just ran into a wall and powered down a couple of feet from the charging station.
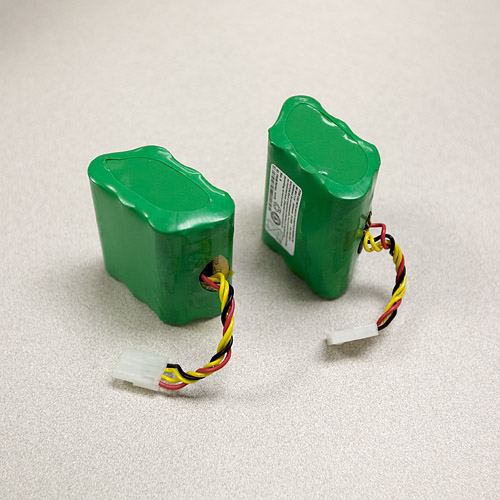
For the tear-down, we first removed the batteries from the bot. They are a couple of standard 7.2V 3200mAh Nickel Metal-Hydride cells.
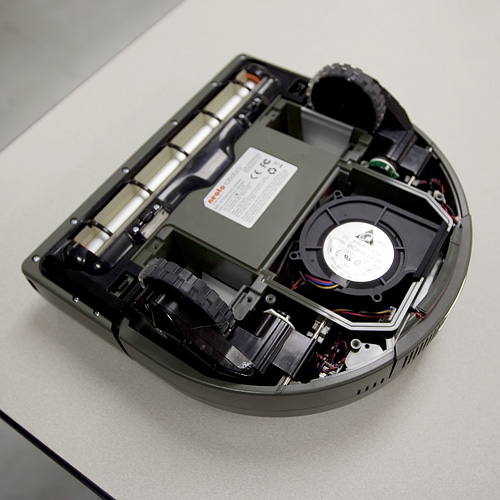
After removing a couple more panels, we got down to some guts.
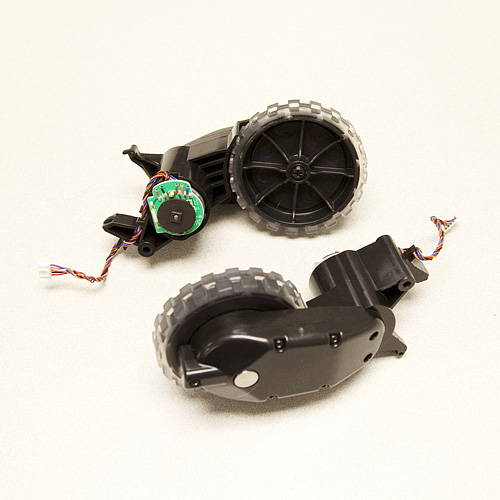
There's a suction fan, two spring-loaded wheel assemblies, and the vacuum brush. The wheel assemblies are one-piece motor-with-gearbox combinations. Each motor has a (seemingly custom) digital encoder. The axles are spring loaded and trigger a simple tactile switch to detect if the robot has been picked up (or fallen off a cliff).
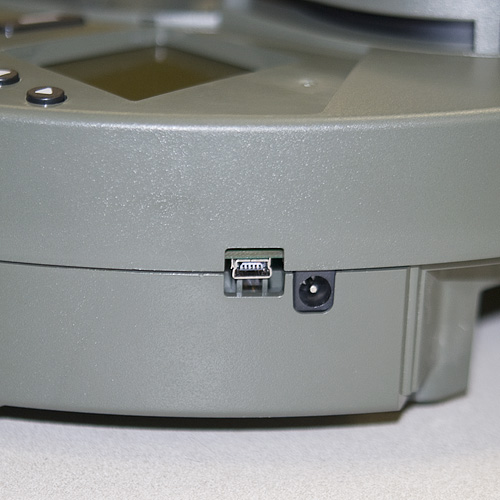
Before removing the rest of the case, we poked around a bit more and discovered this:
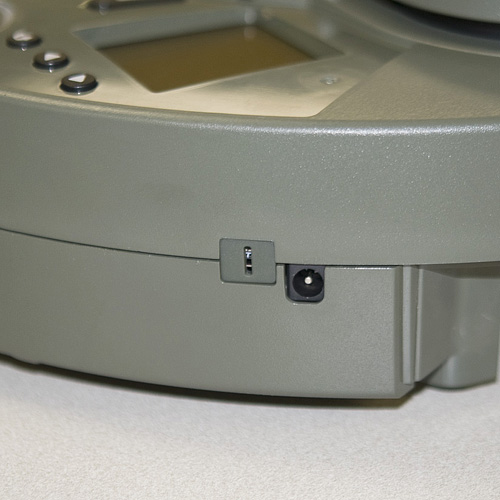
A "hidden" USB port. It's possibly for USB bootloading or troubleshooting at the factory. We also spotted the single wall sensor on the right side of the bot.
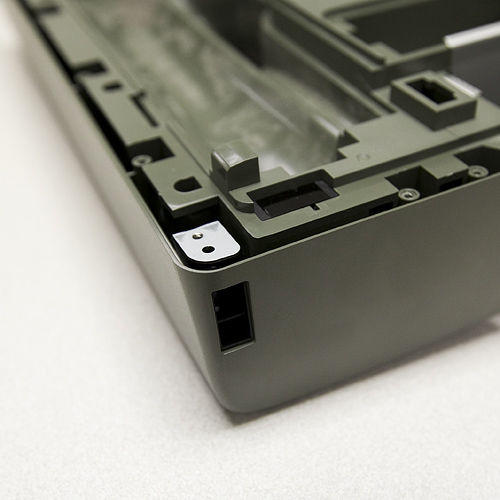
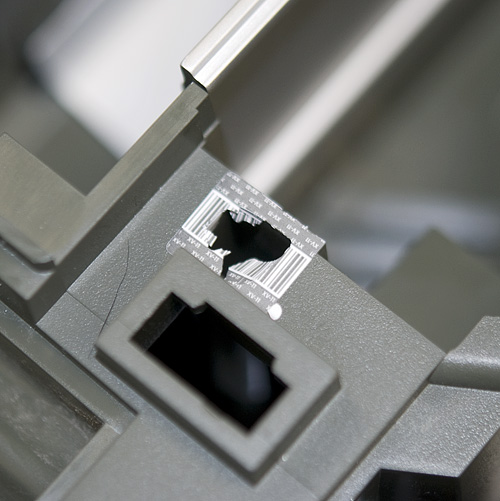
The last two screws to remove the top half of the case were hidden under some flimsy bar-coded warranty stickers. So we promptly voided the warranty.
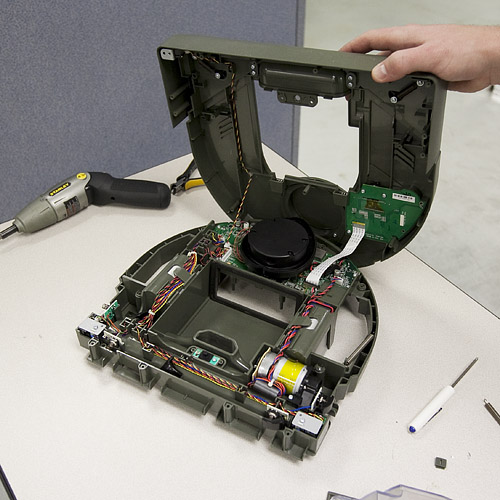
Now we have full access to all the guts of the XV-11.
You can see the Lidar assembly sitting on top of the main processor board, the drive motor for the brush, and the daughterboard for the LCD and buttons. In the front of the bot, we can also see the optical switches for cliff detection, as well as the magnetic sensors that detect the magnetic strip. The Lidar device sits on top of the mainboard, which is controlled by a beefy AT91SAM9XE. Since the Lidar is what we're most interested in, we pulled it off first.
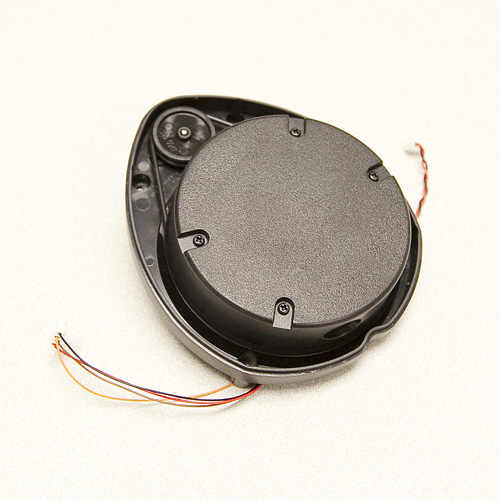
The Lidar unit is fully enclosed in a plastic "turret". It has two wires coming off of the motor that spins the turret, and four wires coming from the inner assembly. We removed the top of the turret to get a look at the mechanism.
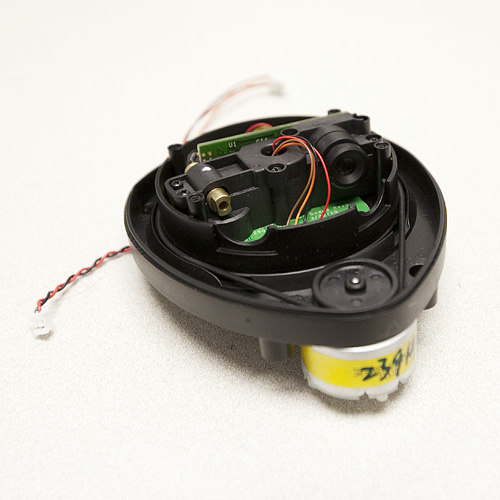
Inside you can see the laser and the CMOS imager that the Lidar uses to detect distance to objects. The white paper on this device insists that it can be built for less than $30, but right now the laser can only be bought if it's inside the robot. Still $400 dollars is a low price for a device that does 1-degree accuracy planar scanning at 10Hz. There are four wires running to the laser assembly. Upon closer inspection, we see that these wires are soldered to pads on the board labeled "TX", "RX", "GND", and "VCC". So it's not exactly tough to figure out what communication protocol the device uses.
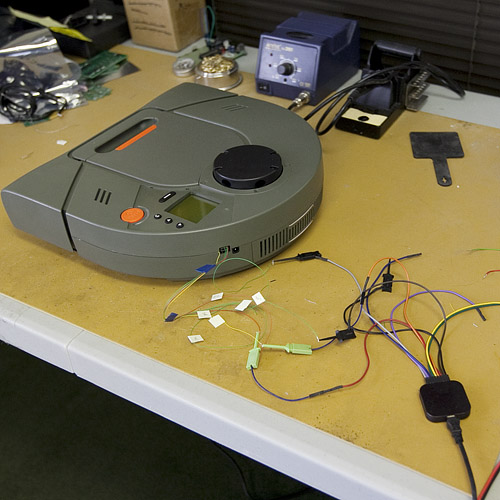
In order to start getting data from the Lidar, we soldered some leads to the communication lines and the motor lines, and assembled the bot again. We fed the lines out of the hole for the USB port on the case of the bot, so the bot should now be able to run normally while we sniff the data lines. The motor spinning the Lidar runs using a 12V square wave with a 25% duty cycle. The logic for the Lidar is at 3.3V, so we hooked up one of our logic analyzers and let the bot run.
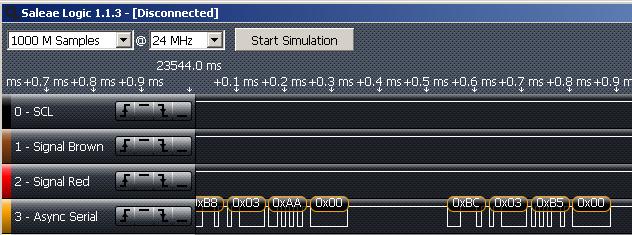
Here's a snippet of the data that we pulled off of the Lidar while the bot was in normal operation.
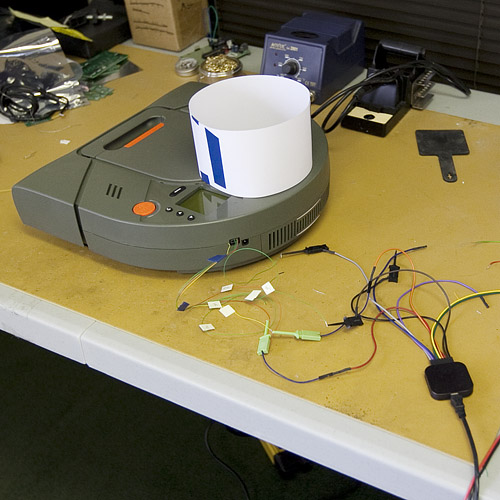
Sure enough, the TX line is spitting out data at 115200 baud. Right now, we don't know what the data means, so we conducted two more similar tests. In the first we placed a 13cm round paper "shield" around the rangefinder, so that when it runs, it should see the same distance at all 360 degrees.
Sure enough, the bot ran for about 10 seconds, then stopped and displayed "LDS error. Visit website." We did the same test with a 22cm shield, and the same thing happened. In the logic analyzer for both tests, the Lidar spit out the same value the whole time, but different values depending on whether we were using the 13 or 22cm shield. If you are interested, here are the analyzer files for the three tests. The software for the analyzer is free online.
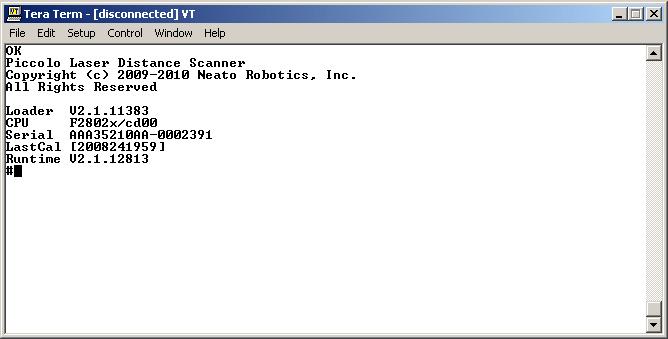
For our last test, we pulled the Lidar out of the bot again. This time we hooked the data lines straight into TeraTerm, reset the power to the device, and saw this
When we spin the turret by hand, the device prints the message "Spin..." and then starts spitting out data (unreadable by TeraTerm of course). We haven't got it hacked yet, but it's a good start. Hopefully some interested party can use some of this data to get some usable software going. In the meantime we're going to keep digging up data. Happy hacking!
http://www.makeclub.org/ideas/items/view/18399
http://robotbox.net/blog/gallamine/open-lidar-project-hack-neato-xv-11-lidar-200-bounty
Ultra Low-Cost Laser Rangefinders Actualized by Neato Robotics
http://www.hizook.com/blog/2009/12/20/ultra-low-cost-laser-rangefinders-actualized-neato-robotics
A commercially-available ultra low-cost laser rangefinder is finally set to hit department store shelves in February! I'm speaking of the laser rangefinder presented at ICRA 2008 that costs $30 to build (commented on here at Hizook almost one year ago) that sits atop the recently announced Neato Robotics XV-11 vacuum cleaner. Others have thoroughly discussed the XV-11's competitiveness with iRobot products, the possible patent infringement of iRobots square-front design, and its ability to perform SLAM (Simultaneous Localization and Mapping). But everyone has glossed over the coolest part: Forget the $400 robot, $60 batteries, $30 wheels (etc.) available for pre-order on Neato's website... if made available, sub-$100 laser rangefinders would revolutionize hobby robotics! Read on for a description of this compelling (future?) component.
Neato sponsored an ICRA 2008 research paper entitled, "A Low-Cost Laser Distance Sensor," that detailed the design of laser rangefinder that costs only $30 to build. Called the "Revo LDS", it is pictured below.


Unlike the more expensive (many thousands of dollars) laser rangefinders that use time of flight measurements, such as those discussed here and here, the Revo LDS triangulates the distance to an object using a fixed-angle laser pointer and a CMOS imager, with a known baseline between the two. To quote:
A compact, rigid point-beam triangulation module incorporating laser, imager, and electronics. With a low-cost CMOS imager and a DSP for subpixel interpolation, we get good range resolution out to 6 m with a 5 cm baseline, at a 4 KHz rate. The key insight to the Revo is that high precision is possible with a small baseline, because of the digital image sensor.A motor spins the unit at 10Hz to give a full 360-degree field of view. An optical encoder gives 1-degree angular accuracy. Not exactly Earth-shattering, but simple and low-cost. An enclosed, robust USB version of this sensor would have broad appeal, and open up the world of hobby robotics to a sensor that is ubiquitous on research robots. Oh, and I suppose the XV-11 isn't half-bad either:
I seriously hope that Neato makes the laser rangefinder component available separately, but it is currently not listed on their website for purchase. At the moment, I am a bit worried about the possibility of litigation due to similarities between the XV-11 and an iRobot patent (see below). Hopefully they see the light and avoid destructive lawsuits.


While I'm on the topic... The idea of triangulating distances using lasers and cheap CMOS/CCD imagers is by no means new. My favorite example is Morgan Quigley's "Borg Scanner" from Stanford's STAIR Lab. The Borg Scanner performs triangulation along an entire line (plane) simultaneously using the exact same technique. Scanning a green laser-line across a scene produces dense 3D point clouds. You can see a few photos and a video of it being used below. A forthcoming ICRA 2009 paper on the scanner entitled "High-Accuracy 3D Sensing for Mobile Manipulation: Improving Object Detection and Door Opening" is also quite good. I've heard rumors that design and fabrication details for this sensor is going to be released as "open source"; I am anxious to give it a try.


Whether a commercial unit or home-brewed open source initiative, it appears that ultra low-cost laser rangefinders are on the horizon. Next on the wish-list: low-cost flash LADAR -- perhaps Microsoft's Project Natal will deliver...?


沒有留言:
張貼留言
注意:只有此網誌的成員可以留言。